
I’ve been working with C# WPF for a while now, and trust me, it’s revolutionary compared to the older Windows Forms technology. WPF (Windows Presentation Foundation) is Microsoft’s robust framework for building rich desktop applications with stunning visuals that Windows Forms could never have achieved.
When I first started building desktop applications, the differences between WPF and Windows Forms blew me away. WPF introduces an entirely different approach to UI development, separating design from logic through XAML (eXtensible Application Markup Language). This separation is game-changing for developers who want to create modern, responsive applications.
Why You Should Learn WPF Right Now
The desktop application space has undergone significant evolution, but WPF remains remarkably relevant. Here’s why you need to learn it:
- It’s still Microsoft’s premier desktop UI framework – Despite newer alternatives, WPF continues to receive updates and support
- XAML skills transfer to other platforms – Once you master XAML in WPF, you’ll find it easier to work with technologies like Xamarin, MAUI, and UWP
- Superior data binding capabilities – WPF’s binding system is mighty and flexible
- Rich animation and graphics support – Create stunning visual effects with minimal code
- Enterprise adoption – Countless businesses rely on WPF applications, creating steady job opportunities.
The learning curve might be steeper than Windows Forms, but the payoff is enormous. You’ll build applications that are more maintainable, scalable, and visually impressive.
Setting Up Your Development Environment
Before diving into code, you need the right tools. Here’s what you’ll need:
- Visual Studio – Visual Studio 2022 Community Edition works perfectly (it’s free!)
- .NET Framework or .NET Core/6/7/8 – The latest versions of .NET support WPF development
- Basic C# knowledge – You should understand C# fundamentals before tackling WPF
To create your first WPF project:
- Open Visual Studio
- Click “Create a new project”
- Search for “WPF” in the project templates
- Select “WPF Application” (.NET Framework) or “WPF Application” (.NET Core/6/7/8)
- Name your project and click “Create”
Visual Studio will generate a basic WPF project structure with App.xaml and MainWindow.xaml files. These are the foundation of your application.
Understanding XAML – The Heart of WPF
XAML is the declarative markup language that defines your WPF user interface. Think of it as HTML for desktop applications – it describes what your UI contains rather than how it’s created.
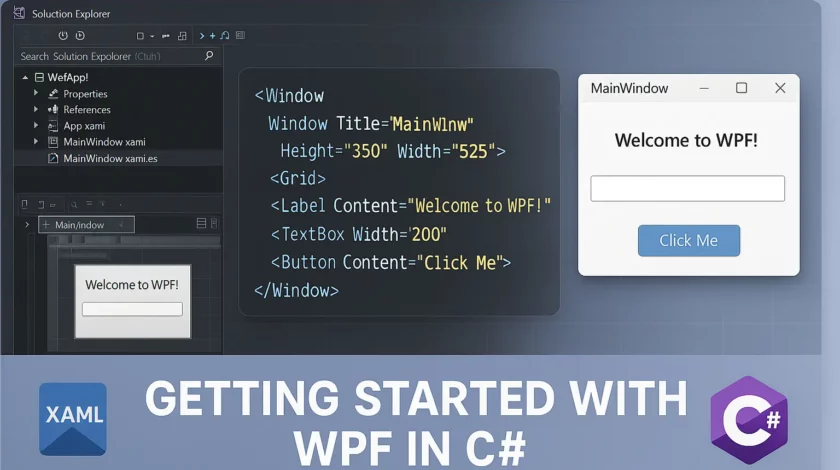
Here’s a simple XAML example:
<Window x:Class="MyFirstWpfApp.MainWindow"
        xmlns="http://schemas.microsoft.com/winfx/2006/xaml/presentation"
        xmlns:x="http://schemas.microsoft.com/winfx/2006/xaml"
        Title="My First WPF App" Height="350" Width="525">
    <Grid>
        <Button Content="Click Me!" HorizontalAlignment="Center"
                VerticalAlignment="Center" Width="100" Height="30"/>
    </Grid>
</Window>Code language: HTML, XML (xml)
The structure is hierarchical – elements can contain other elements. The Window element is the root, containing a Grid layout panel, which in turn contains a Button.
What makes XAML powerful is that it’s not just a static definition; it’s also dynamic. Every XAML element corresponds to a C# object, allowing you to manipulate the UI programmatically.
Essential WPF Concepts You Must Know
Layout Systems
Unlike Windows Forms, where you place controls at exact coordinates, WPF uses layout containers that manage the positioning of their child elements. This makes your UI responsive and adaptable to different screen sizes.
The most common layout panels are:
- Grid – Arranges elements in rows and columns
- StackPanel – Stacks elements horizontally or vertically
- WrapPanel – Positions elements in sequence and wraps to a new line when needed
- DockPanel – Docks elements to the edges of the container
- Canvas – Provides absolute positioning (use sparingly!)
For beginners, I recommend mastering Grid first. It’s incredibly versatile:
<Grid>
    <Grid.RowDefinitions>
        <RowDefinition Height="Auto"/>
        <RowDefinition Height="*"/>
        <RowDefinition Height="100"/>
    </Grid.RowDefinitions>
    <Grid.ColumnDefinitions>
        <ColumnDefinition Width="200"/>
        <ColumnDefinition Width="*"/>
    </Grid.ColumnDefinitions>

    <TextBlock Grid.Row="0" Grid.Column="0" Text="Top Left"/>
    <Button Grid.Row="1" Grid.Column="1" Content="Center Right"/>
</Grid>Code language: HTML, XML (xml)
Data Binding
Data binding is where WPF truly shines. It creates a connection between UI elements and data sources, eliminating tons of boilerplate code.
A simple binding looks like this:
<TextBox Text="{Binding UserName}"/>Code language: HTML, XML (xml)This binds the TextBox’s Text property to a UserName property in your data context. When one changes, the other updates automatically!
For data binding to work, you need:
- A data context (typically a view model class)
- Properties that implement INotifyPropertyChanged
- Binding expressions in your XAML
Here’s a quick example:
public class MainViewModel : INotifyPropertyChanged
{
    private string _userName;

    public string UserName
    {
        get { return _userName; }
        set
        {
            if (_userName != value)
            {
                _userName = value;
                OnPropertyChanged(nameof(UserName));
            }
        }
    }

    public event PropertyChangedEventHandler PropertyChanged;

    protected void OnPropertyChanged(string propertyName)
    {
        PropertyChanged?.Invoke(this, new PropertyChangedEventArgs(propertyName));
    }
}
Then set it as your DataContext:
public MainWindow()
{
    InitializeComponent();
    DataContext = new MainViewModel();
}Code language: PHP (php)
Styles and Templates
WPF allows you to customize the appearance of controls through styles and templates completely.
Styles are collections of property settings that can be applied to multiple elements:
<Window.Resources>
    <Style TargetType="Button">
        <Setter Property="Background" Value="LightBlue"/>
        <Setter Property="Foreground" Value="Navy"/>
        <Setter Property="Padding" Value="10,5"/>
        <Setter Property="Margin" Value="5"/>
    </Style>
</Window.Resources>Code language: HTML, XML (xml)
Control templates go further, letting you completely redefine how a control looks while preserving its behavior:
<ControlTemplate TargetType="Button">
    <Border Background="{TemplateBinding Background}"
            CornerRadius="8"
            BorderBrush="Gray"
            BorderThickness="1">
        <ContentPresenter HorizontalAlignment="Center"
                          VerticalAlignment="Center"/>
    </Border>
</ControlTemplate>Code language: HTML, XML (xml)
Building Your First C# WPF Application: Step by Step
Let’s create a simple application that demonstrates these concepts. We’ll make a basic contact management app:
- Create a new WPF project in Visual Studio
- Define a Contact class:
public class Contact : INotifyPropertyChanged
{
    private string _name;
    private string _email;

    public string Name
    {
        get { return _name; }
        set
        {
            if (_name != value)
            {
                _name = value;
                OnPropertyChanged(nameof(Name));
            }
        }
    }

    public string Email
    {
        get { return _email; }
        set
        {
            if (_email != value)
            {
                _email = value;
                OnPropertyChanged(nameof(Email));
            }
        }
    }

    public event PropertyChangedEventHandler PropertyChanged;

    protected void OnPropertyChanged(string propertyName)
    {
        PropertyChanged?.Invoke(this, new PropertyChangedEventArgs(propertyName));
    }
}- Create a MainViewModel:
public class MainViewModel : INotifyPropertyChanged
{
    private ObservableCollection<Contact> _contacts;
    private Contact _selectedContact;

    public ObservableCollection<Contact> Contacts
    {
        get { return _contacts; }
        set
        {
            _contacts = value;
            OnPropertyChanged(nameof(Contacts));
        }
    }

    public Contact SelectedContact
    {
        get { return _selectedContact; }
        set
        {
            _selectedContact = value;
            OnPropertyChanged(nameof(SelectedContact));
        }
    }

    public ICommand AddContactCommand { get; private set; }

    public MainViewModel()
    {
        Contacts = new ObservableCollection<Contact>
        {
            new Contact { Name = "John Doe", Email = "[email protected]" },
            new Contact { Name = "Jane Smith", Email = "[email protected]" }
        };

        AddContactCommand = new RelayCommand(_ => AddContact());
    }

    private void AddContact()
    {
        var newContact = new Contact { Name = "New Contact", Email = "[email protected]" };
        Contacts.Add(newContact);
        SelectedContact = newContact;
    }

    public event PropertyChangedEventHandler PropertyChanged;

    protected void OnPropertyChanged(string propertyName)
    {
        PropertyChanged?.Invoke(this, new PropertyChangedEventArgs(propertyName));
    }
}Code language: HTML, XML (xml)- Define a simple RelayCommand class for command binding:
public class RelayCommand : ICommand
{
    private readonly Action<object> _execute;
    private readonly Predicate<object> _canExecute;

    public RelayCommand(Action<object> execute, Predicate<object> canExecute = null)
    {
        _execute = execute ?? throw new ArgumentNullException(nameof(execute));
        _canExecute = canExecute;
    }

    public bool CanExecute(object parameter)
    {
        return _canExecute == null || _canExecute(parameter);
    }

    public void Execute(object parameter)
    {
        _execute(parameter);
    }

    public event EventHandler CanExecuteChanged
    {
        add { CommandManager.RequerySuggested += value; }
        remove { CommandManager.RequerySuggested -= value; }
    }
}Code language: HTML, XML (xml)- Design the UI in MainWindow.xaml:
<Window x:Class="ContactManager.MainWindow"
        xmlns="http://schemas.microsoft.com/winfx/2006/xaml/presentation"
        xmlns:x="http://schemas.microsoft.com/winfx/2006/xaml"
        Title="Contact Manager" Height="450" Width="800">
    <Grid Margin="10">
        <Grid.ColumnDefinitions>
            <ColumnDefinition Width="*"/>
            <ColumnDefinition Width="Auto"/>
            <ColumnDefinition Width="*"/>
        </Grid.ColumnDefinitions>

        <!-- Contact List -->
        <DockPanel Grid.Column="0">
            <TextBlock DockPanel.Dock="Top" Text="Contacts" FontSize="16" FontWeight="Bold" Margin="0,0,0,5"/>
            <Button DockPanel.Dock="Bottom" Content="Add Contact" Command="{Binding AddContactCommand}" Margin="0,5,0,0"/>
            <ListView ItemsSource="{Binding Contacts}" SelectedItem="{Binding SelectedContact}">
                <ListView.ItemTemplate>
                    <DataTemplate>
                        <StackPanel>
                            <TextBlock Text="{Binding Name}" FontWeight="Bold"/>
                            <TextBlock Text="{Binding Email}" Foreground="Gray"/>
                        </StackPanel>
                    </DataTemplate>
                </ListView.ItemTemplate>
            </ListView>
        </DockPanel>

        <!-- Separator -->
        <GridSplitter Grid.Column="1" Width="5" HorizontalAlignment="Center" VerticalAlignment="Stretch"/>

        <!-- Contact Details -->
        <Grid Grid.Column="2" DataContext="{Binding SelectedContact}">
            <Grid.RowDefinitions>
                <RowDefinition Height="Auto"/>
                <RowDefinition Height="Auto"/>
                <RowDefinition Height="Auto"/>
                <RowDefinition Height="*"/>
            </Grid.RowDefinitions>
            <Grid.ColumnDefinitions>
                <ColumnDefinition Width="Auto"/>
                <ColumnDefinition Width="*"/>
            </Grid.ColumnDefinitions>

            <TextBlock Grid.Row="0" Grid.ColumnSpan="2" Text="Contact Details" FontSize="16" FontWeight="Bold" Margin="0,0,0,10"/>

            <TextBlock Grid.Row="1" Grid.Column="0" Text="Name:" Margin="0,0,5,0" VerticalAlignment="Center"/>
            <TextBox Grid.Row="1" Grid.Column="1" Text="{Binding Name, UpdateSourceTrigger=PropertyChanged}" Margin="0,5"/>

            <TextBlock Grid.Row="2" Grid.Column="0" Text="Email:" Margin="0,0,5,0" VerticalAlignment="Center"/>
            <TextBox Grid.Row="2" Grid.Column="1" Text="{Binding Email, UpdateSourceTrigger=PropertyChanged}" Margin="0,5"/>
        </Grid>
    </Grid>
</Window>Code language: HTML, XML (xml)- Set the DataContext in the code-behind:
public partial class MainWindow : Window
{
    public MainWindow()
    {
        InitializeComponent();
        DataContext = new MainViewModel();
    }
}
This application demonstrates many WPF concepts in action:
- Data binding with ObservableCollection
- Command binding with ICommand
- Different layout panels
- Templates for customizing the ListView display
- Two-way binding with UpdateSourceTrigger
Common Pitfalls and How to Avoid Them
When learning WPF, you’ll likely encounter these challenges:
- Performance issues with large collections
- Solution: Use virtualization (enabled by default in ListView/ListBox)
- Memory leaks from event handlers
- Solution: Always unsubscribe from events when objects are disposed
- Complicated XAML that’s hard to maintain
- Solution: Extract reusable parts into styles, templates, and user controls
- Slow application startup
- Solution: Use asynchronous loading and consider lazy-loading resources
- UI freezing during long operations
- Solution: Move heavy work to background threads using
Task.Run()
- Solution: Move heavy work to background threads using
Next Steps in Your WPF Journey
Once you’ve mastered the basics, explore these advanced topics:
- MVVM pattern (Model-View-ViewModel) – A design pattern that works perfectly with WPF
- Dependency injection – For more maintainable and testable code
- Custom controls – Create reusable UI components
- Triggers and animations – Add interactive visual effects
- ResourceDictionaries – Create and manage application-wide resources
- DataGrids In WPF – Create Database Bindings in WPF
Conclusion
WPF remains one of the most powerful frameworks for building Windows desktop applications. The combination of XAML for UI declaration and C# for logic creates a flexible, maintainable architecture that scales well from simple tools to complex enterprise applications.
Remember, the learning curve might seem steep at first, but the productivity gains are tremendous once you grasp the core concepts. Start with small projects and gradually incorporate more advanced features as you grow comfortable with the framework.
Happy coding, and welcome to the exciting world of WPF development!
Additional Resource:
Discover more from CodeSamplez.com
Subscribe to get the latest posts sent to your email.
Good short tutorial 😀
Good One…
Really a good precise short intro about WPF. I got quite a few answers of my basic query. Keep the good work rolling.