
Have you ever wondered how multiplayer games send data so quickly? Or how video streaming works behind the scenes? Well, you’re about to discover one of networking’s most powerful tools – UDP! In this guide, I’ll walk you through everything you need to know about UDP socket programming in Java, from absolute basics to creating your own applications.
What is UDP and Why Should You Care?
UDP (User Datagram Protocol) is often overshadowed by its more reliable cousin TCP, but there are TONS of situations where UDP absolutely shines. While TCP ensures every piece of data arrives perfectly intact (great for downloading files or browsing websites), UDP sacrifices some reliability for blazing-fast speed.
Here’s where UDP dominates:
- Multiplayer gaming – When milliseconds matter
- Live video streaming – When continuous flow beats perfect delivery
- Voice over IP (VoIP) – When real-time matters more than perfection
- IoT device communication – When bandwidth is limited
- Private network applications – When the packet loss risk is minimal
As a Java developer, adding UDP to your toolkit opens up incredible possibilities for creating responsive, real-time applications.
Understanding UDP Socket Basics
Before diving into code, let’s understand what makes UDP different:
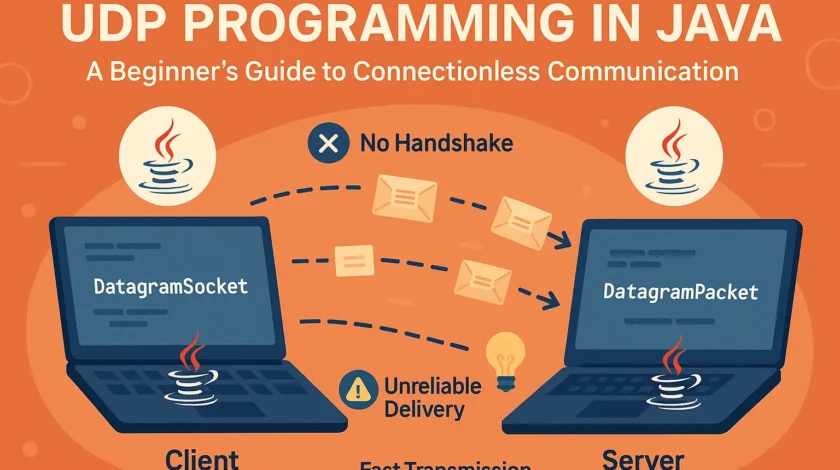
- Connectionless – UDP doesn’t establish a connection before sending data; it just fires packets at their destination
- Unreliable – No guarantees packets will arrive (or arrive in order)
- Lightweight – Minimal overhead means faster transmission
- Simple – Less complex than TCP, making implementation straightforward
These characteristics make UDP perfect when speed trumps perfect reliability. Now let’s see how Java implements these concepts.
Building a Basic UDP Client in Java
To create a UDP client, we need to:
- Create a DatagramSocket
- Prepare our data in a DatagramPacket
- Send the packet to a specific address/port
- Optionally wait for a response
Here’s a complete example that sends a message and waits for a reply:
import java.net.*;

public class UDPClient {
    public static void main(String[] args) {
        DatagramSocket socket = null;

        try {
            // Create socket
            socket = new DatagramSocket();

            // Prepare message
            String message = "Hello World via UDP in Java!";
            byte[] sendData = message.getBytes();

            // Set destination address
            InetAddress serverAddress = InetAddress.getByName("localhost");
            int serverPort = 9876;

            // Create and send packet
            DatagramPacket sendPacket = new DatagramPacket(
                sendData,
                sendData.length,
                serverAddress,
                serverPort
            );
            socket.send(sendPacket);
            System.out.println("Message sent to server!");

            // Prepare to receive response
            byte[] receiveData = new byte[1024];
            DatagramPacket receivePacket = new DatagramPacket(
                receiveData,
                receiveData.length
            );

            // Set timeout and receive response
            socket.setSoTimeout(5000); <em>// 5 second timeout</em>
            socket.receive(receivePacket);

            // Process response
            String response = new String(
                receivePacket.getData(),
                0,
                receivePacket.getLength()
            );
            System.out.println("Response from server: " + response);

        } catch (SocketTimeoutException e) {
            System.out.println("Timeout reached! Server did not respond.");
        } catch (Exception e) {
            System.out.println("Error: " + e.getMessage());
            e.printStackTrace();
        } finally {
            // Always close the socket
            if (socket != null && !socket.isClosed()) {
                socket.close();
            }
        }
    }
}Code language: JavaScript (javascript)
Notice how we’re creating a packet with our message, specifying where to send it, and then launching it into the network. Simple yet powerful!
Creating a UDP Server in Java
Now let’s build the server side that will receive client messages and send back responses:
import java.net.*;

public class UDPServer {
    public static void main(String[] args) {
        DatagramSocket socket = null;

        try {
            // Create socket bound to specific port
            int port = 9876;
            socket = new DatagramSocket(port);
            System.out.println("UDP Server running on port " + port);

            // Server runs forever
            while (true) {
                // Prepare to receive data
                byte[] receiveData = new byte[1024];
                DatagramPacket receivePacket = new DatagramPacket(
                    receiveData,
                    receiveData.length
                );

                // Block until packet received
                System.out.println("Waiting for UDP packets...");
                socket.receive(receivePacket);

                // Process received data
                String clientMessage = new String(
                    receivePacket.getData(),
                    0,
                    receivePacket.getLength()
                );

                InetAddress clientAddress = receivePacket.getAddress();
                int clientPort = receivePacket.getPort();

                System.out.println("Received from " + clientAddress +
                                   ":" + clientPort + " -> " + clientMessage);

                // Prepare response
                String response = "Echo: " + clientMessage;
                byte[] sendData = response.getBytes();

                // Send response back to the same client
                DatagramPacket sendPacket = new DatagramPacket(
                    sendData,
                    sendData.length,
                    clientAddress,
                    clientPort
                );
                socket.send(sendPacket);
                System.out.println("Response sent!");
            }

        } catch (Exception e) {
            System.out.println("Server error: " + e.getMessage());
            e.printStackTrace();
        } finally {
            // Close socket if we ever break out of the loop
            if (socket != null && !socket.isClosed()) {
                socket.close();
            }
        }
    }
}Code language: JavaScript (javascript)
The server’s job is straightforward but critical:
- Create a socket bound to a specific port
- Wait for incoming packets in an endless loop
- Process each packet when received
- Send a response back to the client
- Return to waiting for the next packet
This creates a perpetual service that is ready to handle any client requests that arrive.
Taking It Further: UDP Multicast Programming
Sometimes, you need to send the same message to multiple recipients without duplicating network traffic. That’s where multicast comes in—it’s like a radio broadcast: anyone tuned to the right frequency gets the message.
Here’s how to implement multicast in Java:
Multicast Sender
import java.net.*;

public class MulticastSender {
    public static void main(String[] args) {
        DatagramSocket socket = null;

        try {
            // Create regular datagram socket
            socket = new DatagramSocket();

            // Prepare multicast message
            String message = "Hello everyone!";
            byte[] sendData = message.getBytes();

            // Use multicast address (must be in range 224.0.0.0 to 239.255.255.255)
            InetAddress multicastAddress = InetAddress.getByName("230.0.0.1");
            int port = 4321;

            // Create and send packet to multicast address
            DatagramPacket packet = new DatagramPacket(
                sendData,
                sendData.length,
                multicastAddress,
                port
            );

            socket.send(packet);
            System.out.println("Multicast message sent!");

        } catch (Exception e) {
            e.printStackTrace();
        } finally {
            if (socket != null) {
                socket.close();
            }
        }
    }
}Code language: JavaScript (javascript)
Multicast Receiver
import java.net.*;

public class MulticastReceiver {
    public static void main(String[] args) {
        MulticastSocket socket = null;

        try {
            // Create multicast socket on specific port
            int port = 4321;
            socket = new MulticastSocket(port);

            // Join multicast group
            InetAddress multicastAddress = InetAddress.getByName("230.0.0.1");
            socket.joinGroup(multicastAddress);

            System.out.println("Multicast Receiver running on port " + port);
            System.out.println("Joined multicast group " + multicastAddress);

            // Loop forever to receive messages
            while (true) {
                byte[] receiveData = new byte[1024];
                DatagramPacket packet = new DatagramPacket(
                    receiveData,
                    receiveData.length
                );

                socket.receive(packet);

                String message = new String(
                    packet.getData(),
                    0,
                    packet.getLength()
                );

                System.out.println("Received multicast message: " + message);
            }

        } catch (Exception e) {
            e.printStackTrace();
        } finally {
            if (socket != null) {
                try {
                    socket.leaveGroup(InetAddress.getByName("230.0.0.1"));
                } catch (Exception e) {
                    // Ignore
                }
                socket.close();
            }
        }
    }
}Code language: JavaScript (javascript)
The key difference with multicast is that receivers must explicitly join a multicast group to receive messages. However, multiple receivers can all listen for the same multicast messages.
Advanced Features in Modern Java UDP Socket Programming
Since Java’s initial release, several improvements have been made to UDP socket programming:
1. NIO DatagramChannel (Java NIO)
For high-performance applications, Java NIO’s DatagramChannel provides non-blocking UDP operations:
import java.net.*;
import java.nio.*;
import java.nio.channels.*;

public class NIOUDPExample {
    public static void main(String[] args) throws Exception {
        // Open and bind a datagram channel
        DatagramChannel channel = DatagramChannel.open();
        channel.bind(new InetSocketAddress(9876));

        // Set to non-blocking mode
        channel.configureBlocking(false);

        // Create buffer for data
        ByteBuffer buffer = ByteBuffer.allocate(1024);

        while (true) {
            // Clear buffer for reuse
            buffer.clear();

            // Try to receive - returns null if no datagram available
            SocketAddress clientAddress = channel.receive(buffer);

            if (clientAddress != null) {
                // We received something!
                buffer.flip();
                System.out.println("Received: " + new String(buffer.array(), 0, buffer.limit()));

                // Echo it back
                channel.send(buffer, clientAddress);
            }

            // Do other tasks while waiting for datagrams
            System.out.println("Processing other tasks...");
            Thread.sleep(1000);
        }
    }
}Code language: JavaScript (javascript)
2. Socket Options for Fine-Tuning
Modern Java applications can fine-tune UDP behavior:
DatagramSocket socket = new DatagramSocket();

// Increase buffer sizes for high-throughput applications
socket.setReceiveBufferSize(262144);
socket.setSendBufferSize(262144);

// Enable broadcast capability
socket.setBroadcast(true);

// Control how long packets live in the network
socket.setTrafficClass(0x10); <em>// IPTOS_LOWDELAY</em>

// Reuse address to avoid "Address already in use" issues during quick restarts
socket.setReuseAddress(true);Code language: JavaScript (javascript)
3. Using Java’s Built-in Record Class for Cleaner Code (Java 16+)
record UDPMessage(String content, InetAddress sender, int port) {
    public byte[] toBytes() {
        return content.getBytes();
    }

    public static UDPMessage fromPacket(DatagramPacket packet) {
        String content = new String(packet.getData(), 0, packet.getLength());
        return new UDPMessage(content, packet.getAddress(), packet.getPort());
    }
}Code language: JavaScript (javascript)
Common Challenges and Solutions in UDP Programming
1. Packet Size Limitations
UDP datagrams have practical size limits (~65KB maximum, but usually much smaller):
// Don't exceed MTU to avoid fragmentation
int maxSafePayloadSize = 508; <em>// Conservative safe value</em>

// For larger data, split into multiple packets
byte[] largeData = getVeryLargeData();
int offset = 0;

while (offset < largeData.length) {
    int chunkSize = Math.min(maxSafePayloadSize, largeData.length - offset);
    byte[] chunk = new byte[chunkSize];
    System.arraycopy(largeData, offset, chunk, 0, chunkSize);

    DatagramPacket packet = new DatagramPacket(chunk, chunkSize, destination, port);
    socket.send(packet);

    offset += chunkSize;
}Code language: JavaScript (javascript)
2. Handling Packet Loss
Since UDP doesn’t guarantee delivery, critical applications should implement their own reliability mechanisms:
// Simple acknowledgment system
int maxRetries = 5;
int retry = 0;
boolean ackReceived = false;

while (!ackReceived && retry < maxRetries) {
    // Send packet with sequence number
    String message = "DATA|" + sequenceNumber + "|Your actual data here";
    byte[] sendData = message.getBytes();

    DatagramPacket sendPacket = new DatagramPacket(
        sendData, sendData.length, serverAddress, serverPort);
    socket.send(sendPacket);

    // Wait for acknowledgment with timeout
    try {
        byte[] ackBuffer = new byte[1024];
        DatagramPacket ackPacket = new DatagramPacket(ackBuffer, ackBuffer.length);
        socket.setSoTimeout(1000); <em>// 1 second timeout</em>
        socket.receive(ackPacket);

        String ack = new String(ackPacket.getData(), 0, ackPacket.getLength());
        if (ack.equals("ACK|" + sequenceNumber)) {
            ackReceived = true;
            System.out.println("Acknowledgment received!");
        }
    } catch (SocketTimeoutException e) {
        retry++;
        System.out.println("Timeout, retrying... (" + retry + "/" + maxRetries + ")");
    }
}Code language: JavaScript (javascript)
3. Testing Network Conditions
When developing UDP applications, testing under various network conditions is crucial:
// Simulate packet loss (for testing only)
if (Math.random() < 0.2) { // 20% packet loss
    System.out.println("Simulating packet loss - not sending");
    return; // Skip sending this packet
}

// Simulate network latency (for testing only)
try {
    int artificialDelayMs = (int)(Math.random() * 200); <em>// 0-200ms delay</em>
    Thread.sleep(artificialDelayMs);
} catch (InterruptedException e) {
    Thread.currentThread().interrupt();
}Code language: JavaScript (javascript)
When to Choose UDP Over TCP
Here’s a quick decision guide for when UDP might be the right choice
| Feature | UDP | TCP |
| Speed | ✅ Faster | ❌ Slower |
| Reliability | ❌ Not guaranteed | ✅ Guaranteed |
| Order preservation | ❌ Not preserved | ✅ Preserved |
| Connection overhead | ✅ None | ❌ Higher |
| Best for | Real-time, high-speed | Data accuracy |
| Implementation complexity | ✅ Simpler | ❌ More complex |
Conclusion
UDP socket programming in Java opens up incredible possibilities for real-time and high-performance network applications. While it requires handling some reliability issues yourself, the speed and simplicity make it perfect for many modern use cases.
I hope this guide has given you everything you need to build your own Java UDP applications. Whether you’re creating the next multiplayer game, streaming service, or IoT system, UDP’s efficiency and speed will serve you well!
Remember – UDP might not guarantee delivery, but it absolutely guarantees performance when you need it most.
Got questions about UDP programming in Java? Feel free to leave a comment below. Happy coding! 🚀
Recommended Resources
- Java Network Programming, 4th Edition
- Oracle’s Java Networking Documentation
- Effective Java, 3rd Edition
Discover more from CodeSamplez.com
Subscribe to get the latest posts sent to your email.
Thanks Rana for the writeup and the code. Quite useful.