
Today, we will explore how to set up an amazon EC2 Linux instance (micro) in the cloud and get it running successfully. We will also see how to attach an elastic ip to our instance and discuss about some points/facts which we will need to be aware of. This is my second article among the amazon tutorials series. I hope you already signed up with AWS free usage tier and ready to claim your free server.
What Is EC2 Regions?
Well, understanding the term ‘region’ is a vital and important as a AWS user. Amazon has their data centers distributed in various area around the world. Each key area are referred as a region. Some EC2 resources are shared by regions and some aren’t. Depending on region, price also varies. Please check the ec2 pricing section for more details. However, as this tutorial series will walk you through the free trial, so, no need to worry about region selection at this moment. Its enough to get only familiar with it.
Create A New Amazon EC2 Linux Instance:
-
First Log in to your AWS console and select EC2 service console. After you reach the EC2 dashboard, you should see a page like as follows, which summarizes your EC2 statistics like number of instances/elastic IP/EBS volume, service status etc:

-
Though you can launch a new instance right from this dashboard page, let’s have a look at the instances page without any instance running, as well. Click on the ‘instances’ link on left menu and you will reach a window which should look like as follows:

-
Now click on the ‘launch instance’ button and it will bring a new instance launch window with three different ‘wizard’ options to assist you: classic, quick launch and AWS marketplace as follows:

-
Quick launch will show minimal options and AWS marketplace is for who want to buy environment ready instance. As we will learn to set up the environment ourselves, we will use the classic wizard for exploring all possible options. Lets select it(if not already) and click next. You will see a request instance wizard as follows:

-
Here, you will be able to choose what type of instance you wish to launch with all available operating system(32/64 bit) options. Note that, not all instance types are under free tier. Only the ones with a star mark next to it. In my case, I did choose a Ubuntu Server 12.04 LTS(64 bit) instance. You can do so or a different one. Then you will be taken to next stage to enter ‘instance details’ as follows:

-
Now this stage has few sub stages. Firstly, you will get a simple window for entering key-value pairs. you can simply add ‘name’ key with your desired value (optional) and move to next sub stage:

-
Here, you will be able to select number of instances you want to launch, instance type availability zone etc. You will have option to request spot instance here as well. Lets select 1 micro instance with no preference for availability zone(one will be assigned automatically) and forward to next sub stage for storage configuration:

-
For Linux micro instance, it’s provided with default 8GB root storage (for windows storage, it’s bigger though), which is enough to get started. We don’t need to configure EBS storage now, we will do it later. Now lets move to next sub-stage of advance options:

-
As a beginner, we can skip it easily. However, you can use the option for ‘prevent accidental termination of instance’ and ‘shutdown’ behavior if you need at all. Lets move to next stage of security/firewall configuration:

-
Here, you can either select an existing security group or create a new one. If you have no intention of use more than one instance at all or want to use similar security for more than one instance, then its easy to just select the ‘default’ group given automatically. You can change/modify security group anytime, so no worry at all if you are not sure what to do at this moment. After completing the section, we are done with all option. On last stage you will be shown the full summary configuration for review:

-
After you complete the review an submit, it will take a while to get the instance running and you will now see a new look of instances page:

Congratulation! You made it. We now have an active amazon ec2 linux instance up and running.
Start/Stop/Terminate/Rebooting Of An Instance:
These operations are fairly easy to perform. Just you need to check besides the instance(s) you want operated and use the ‘Actions’ drop-down’s ‘Actions’ commands to do so. Right clicking on an instance will work as well. To remind you, free tier are counted as hours utilized, not by the number of instances. So, you can have multiple ec2 instances up and running under AWS free tier as long as you don’t overflowed per month allowed hours. Keeping some instances stopped will help you a lot in this case 🙂 . Also, be aware that, amazon has an advance option which causes termination of an instance upon shut down(see step 9 above). So, be careful whether you have this settings or not and using it accordingly.
Attaching An Elastic IP To EC2 Instance:
Attaching your EC2 instance to a dedicated IP address is a wise decision. By default, even without a IP, you will be able to access your instance with a DNS name assigned by amazon, randomly.With which you can connect to your server or access your web application using it as an HTTP URL.
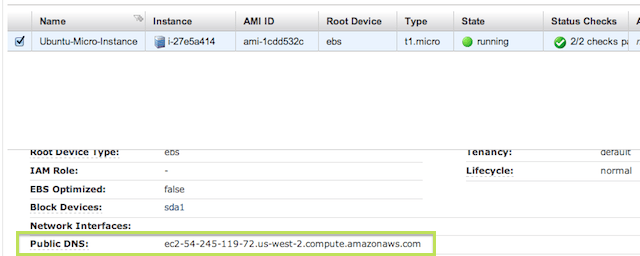
The bad news is, this public DNS name will be changed over time whenever you stop and run or reboot your instance. So, not a very good idea even for development/testing purpose at all. To get relief, elastic IP came on board. You can get it free as well during your free trial time.
To get a new IP, please go to “NETWORK & SECURITY” -> “Elastic IPs” menu option on the left panel and create ‘allocate new address’ button. You will ask to accept for a confirmation dialogue. As soon as you accept it, a new available ip will be shown up on the list. Now, check the IP and click ‘associate address’ option. You will be shown with a small dialogue as follow:

Select your desired instance(if have more than one) and click OK. Now, We are done! now you can access/recognize your cloud server with this dedicated IP.
References:
As I said before, amazon has a good documentation for their services. Please read their documentation for launching an instance also if you have some confusion on any of this article’s section. Still have a question in mind? Feel free to ask here by commenting. Also, stay tuned for the next post about working with EC2 security groups and connect to your EC2 instance.
[…] by the IP instead of the big ugly public DNS name. I have already discussed how to do that while setting up your EC2 linux instance. Follow that if you haven’t this setup […]